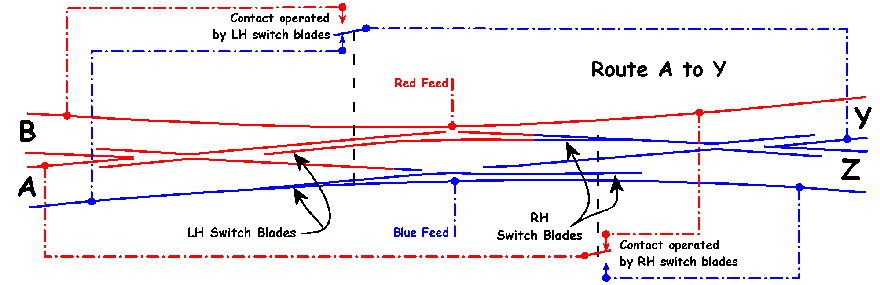
 A to Z
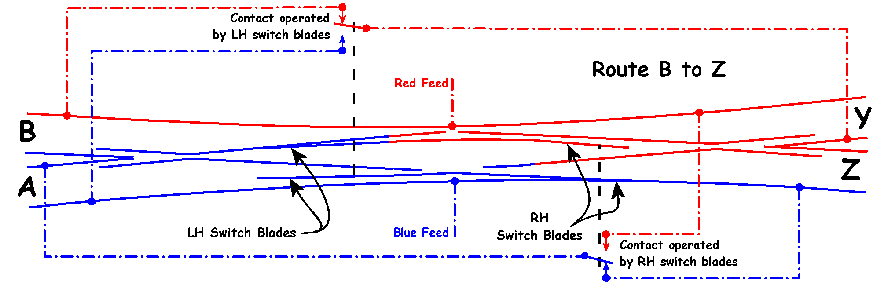
 B to Z
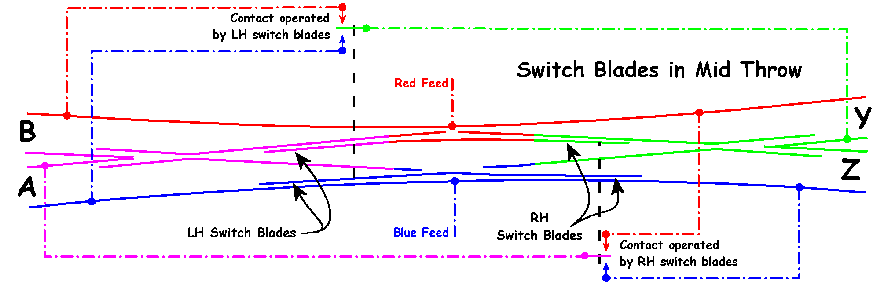
The diagram below shows, initially, the single slip with all switch blades in mid throw.
Move your cursor on and off the blocks below left to see the effect of switching the single slip.
Note that each colour represents an electrical section of the single slip.
If the contacts are not present and the switch blades aren't touching the stock rails
then there will be no connection between the sections.

| Return to Point Wiring Front Page | Return to Site Front Page |
| On the right is a link to a downloadable pdf file giving the information on this page. In order to read it you will need to have Adobe Acrobat, or an equivalent, on your computer. |
Download Single Slip pdf |
| If you don't already have such a program installed, click the logo right for a free download of Adobe Acrobat. |
|